It is very easy to build a chatbot in a Discord server thanks to great AI models like GPT-3, GPT-J, and GPT-NeoX. In this article, we show you how to code your own conversational bot in Node.js by using GPT-J and GPT-NeoX through the NLP Cloud API.

It is very easy to build a chatbot in a Discord server thanks to great AI models like GPT-3, GPT-J, and GPT-NeoX. In this article, we show you how to code your own conversational bot in Node.js by using GPT-J and GPT-NeoX through the NLP Cloud API.

Discord is a widely adopted messaging platform. It is more and more common to see people create their own Discord server for their project in order for a community to easily get together. Many companies have actually created their own Discord server in order to foster their own user community.
Discord can either be self-hosted or used through the Discord web application. A great thing with Discord is that it has an extensive API to interact with the server, and it is very easy to create a chatbot that will interact with users on Discord.
Many people create chatbots on Discord so users can discuss with an AI about many things. It is very easy to integrate a chatbot into your Discord server. Let's see how to do that!
Over these last 2 years, several great AI models have been released: GPT-3, GPT-J, and GPT-NeoX. These models are very impressive and are especially good at dealing with conversational AI (i.e. chatbots).
You can have a great discussion about literally anything with these models, and it is fairly easy to adapt the models to a specific situation. For example you can configure your GPT-based chatbot to be empathetic, sarcastic, or even good at answering specific questions about your own industry (medical, legal, marketing, etc.).
The only problem is that these models require a lot of computation power, so few people can actually afford to deploy them on their own server. NLP Cloud both proposes GPT-J and GPT-NeoX through an API, so we are going to use these models through on NLP Cloud API in the following example.
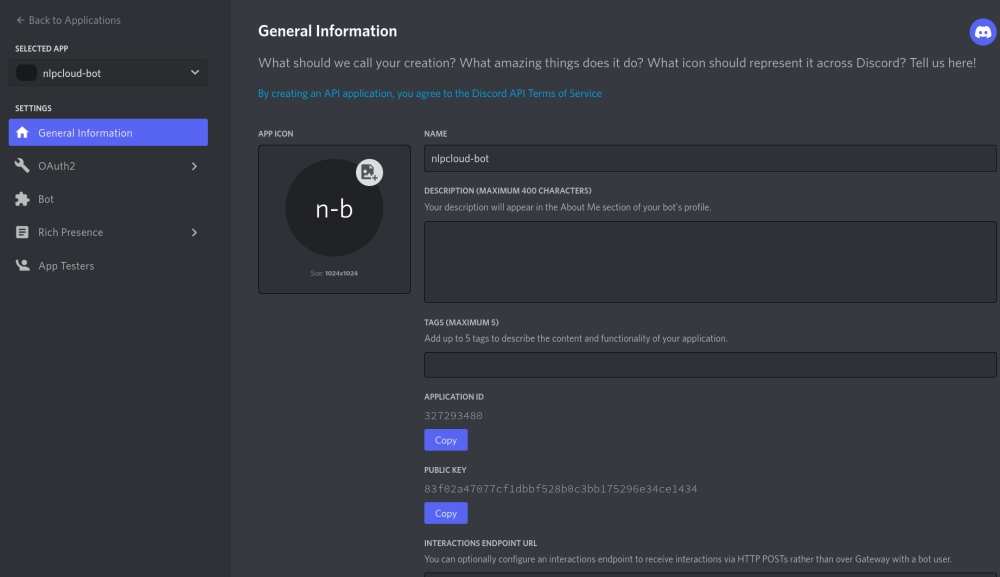
Let's assume you have created an account on Discord.com. Go to the developer portal: here. Select "New Application", name your application, and create it:

Now click "Add a bot", and retrieve your bot token.
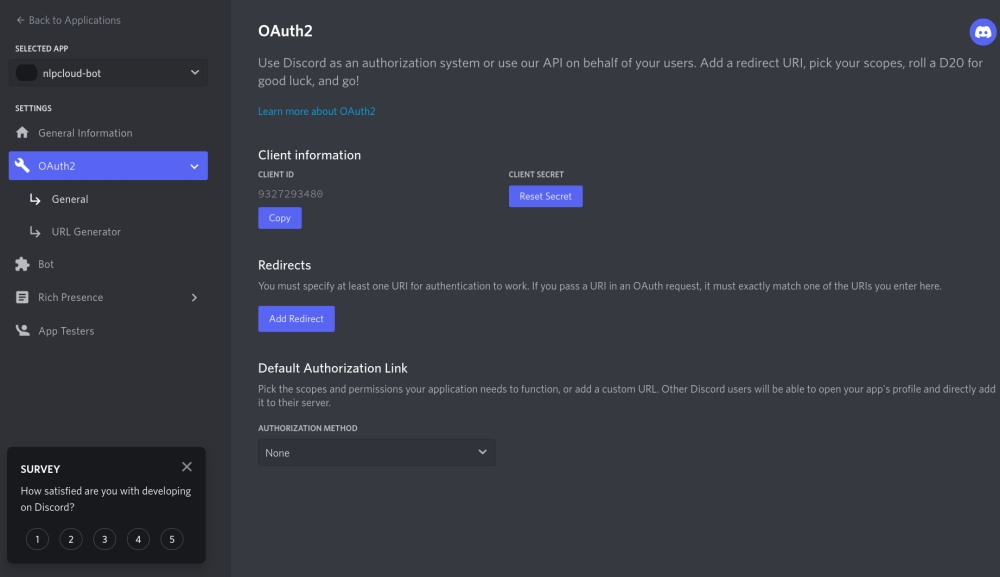
Last step: link your bot to your Discord server. In order to do this, first click the "OAuth2" menu and retrieve your client ID:

Then allow your bot to access your server by visiting the following URL: https://discord.com/oauth2/authorize?scope=bot&permissions=8&client_id=CLIENT_ID (replace CLIENT_ID with your own client ID retrieved earlier).
Everything is ok on the Discord side. Now let's retrieve an NLP Cloud API token!
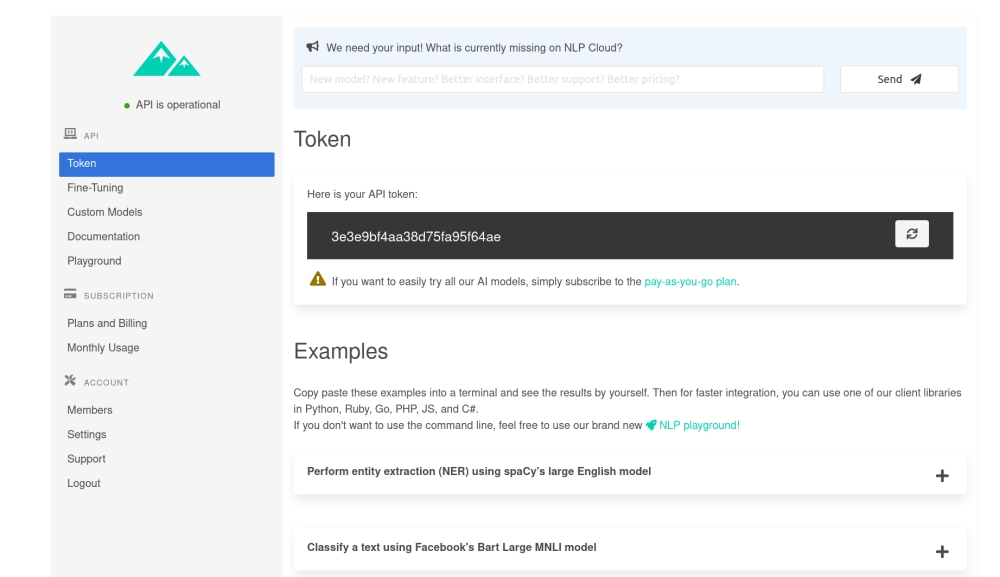
Let's assume you have created an account on NLP Cloud. Simply retrieve your API token in your dashboard:

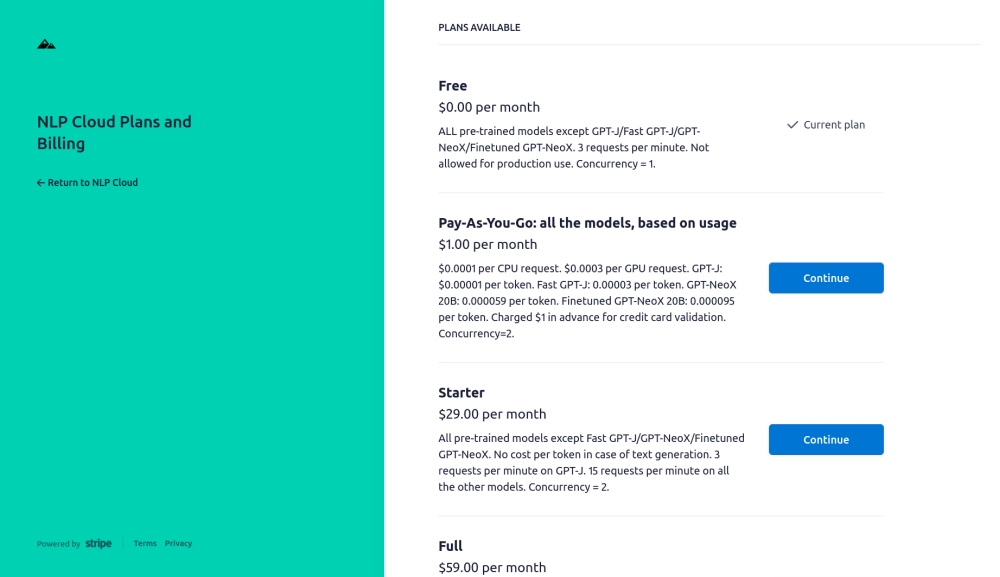
Then subscribe to the pay-as-you-go plan that will give you access to the GPT-J and GPT-NeoX models (the first 100k tokens are free which will make your tests easier).

You can now start coding your Node.js bot!
Both Discord and NLP Cloud have Node.js clients, so the development will be very easy.
Here is a first version:
const NLPCloudClient = require('nlpcloud');
const { Client, Intents } = require('discord.js');

// Load NLP Cloud token and Discord Bot token.
const nlpcloudToken = process.env.NLPCLOUD_TOKEN;
if (nlpcloudToken == null) {
    console.error('No NLP Cloud token received');
    process.exit();
}
const discordBotToken = process.env.DISCORD_BOT_TOKEN;
if (discordBotToken == null) {
    console.error('No Discord bot token received');
    process.exit();
}

// Initialize the NLP Cloud and Discord clients.
const nlpCloudClient = new NLPCloudClient('fast-gpt-j', nlpcloudToken, true)
const discordClient = new Client({intents: [Intents.FLAGS.GUILDS, Intents.FLAGS.GUILD_MESSAGES]});

let history = [];

discordClient.on("messageCreate", function(message) {
    if (message.author.bot) return;

    (async () => {
        // Send request to NLP Cloud.
        const response = await nlpCloudClient.chatbot(`${message.content}`, '', history);

        // Send response to Discord bot.
        message.reply(`${response.data['response']}`);

        // Add the request and response to the chat history.
        history.push({'input':`${message.content}`,'response':`${response.data['response']}`});

    })();
});
As you can see we first retrieve the Discord and NLP Cloud token from environment variables. So first export your tokens in 2 environment variables called "NLPCLOUD_TOKEN" and "DISCORD_BOT_TOKEN". You can also simply copy paste your token directly in the code during your tests if you prefer.
We are using NLP Cloud's Fast GPT-J model - a faster implementation of GPT-J - which is interesting for chatbots as we usually want the response time to be as short as possible. If you want to use GPT-NeoX 20B, simply use "gpt-neox-20b" instead of "fast-gpt-j".
The NLP Cloud "chatbot()" function makes it easy to handle a chatbot based on a GPT model without bothering with complex parameters, prompting, few-shot learning, etc (see below for another example using the generation() function instead of the chatbot() function). The only trick is that after each chatbot response we must keep the response in memory and add it to the history for the following requests. If we don't do that, the chatbot will never remember the history of the conversation!
Our chatbot is now working. Simply launch your script (with "node my_script.js" for example) and you should see that your chatbot is online on your Discord server. You can start talking to it for real!
Our example works but there is a weakness: GPT models cannot handle more than 2048 tokens at the same time (2048 tokens are more or less equal to 1700 words). So at some point your chatbot history might become too large and you will need to truncate it! Here is how you could do that:
const NLPCloudClient = require('nlpcloud');
const { Client, Intents } = require('discord.js');

// Load NLP Cloud token and Discord Bot token.
const nlpcloudToken = process.env.NLPCLOUD_TOKEN;
if (nlpcloudToken == null) {
    console.error('No NLP Cloud token received');
    process.exit();
}
const discordBotToken = process.env.DISCORD_BOT_TOKEN;
if (discordBotToken == null) {
    console.error('No Discord bot token received');
    process.exit();
}

// Initialize the NLP Cloud and Discord clients.
const nlpCloudClient = new NLPCloudClient('fast-gpt-j', nlpcloudToken, true)
const discordClient = new Client({intents: [Intents.FLAGS.GUILDS, Intents.FLAGS.GUILD_MESSAGES]});

let history = [];
let charsCount = 0;

discordClient.on("messageCreate", function(message) {
    if (message.author.bot) return;

    (async () => {
        charsCount += `${message.content}`.length;

        // Send request to NLP Cloud.
        const response = await nlpCloudClient.chatbot(`${message.content}`, '', history);

        charsCount += `${response.data['response']}`.length;

        // Send response to Discord bot.
        message.reply(`${response.data['response']}`);

        // Add the request and response to the chat history.
        history.push({'input':`${message.content}`,'response':`${response.data['response']}`});

        // If the chat history is bigger than 1500 tokens, we remove the oldest elements from
        // the history. We consider that 1 token = 4 characters.
        // The theoretical GPT context limit is 2048 tokens but we choose 1500 tokens instead
        // in order to be safe since the tokens count is not perfectly accurate.
        while (charsCount > 1500 * 4) {
            charsCount -= history[0]['input'].length + history[0]['response'].length;
            history.shift();
        }
    })();
});


discordClient.login(discordBotToken);
As you can see we are simply making sure that the history is not too large, and when it is we remove the oldest elements!
In practice it's rarely a problem because oldest elements in the history are rarely relevant to the conversation. But if they are, you can also implement a more advanced strategy that is selectively keeping and removing some elements based on their relevance.
The above example used the chatbot() function that is a wrapper around the generation() function. The generation() function is a bit harder to use, but it gives you more control over your chatbot. Here is an example:
const NLPCloudClient = require('nlpcloud');
const { Client, Intents } = require('discord.js');

// Load NLP Cloud token and Discord Bot token.
const nlpcloudToken = process.env.NLPCLOUD_TOKEN;
if (nlpcloudToken == null) {
    console.error('No NLP Cloud token received');
    process.exit();
}
const discordBotToken = process.env.DISCORD_BOT_TOKEN;
if (discordBotToken == null) {
    console.error('No Discord bot token received');
    process.exit();
}

// Initialize the NLP Cloud and Discord clients.
const nlpCloudClient = new NLPCloudClient('fast-gpt-j', nlpcloudToken, true)
const discordClient = new Client({intents: [Intents.FLAGS.GUILDS, Intents.FLAGS.GUILD_MESSAGES]});

let history = `Input: Hey, how are you today?
Response: Very well thank you, what about you?
###
Input: I am great.
Response: What are you going to do?
###
Input: Most likely read a couple of book and relax.
Response: Fantastic!`;

discordClient.on("messageCreate", function(message) {
    if (message.author.bot) return;

    (async () => {
        if (history != '') {
            history += '\n###\n'
        }
        let finalContent = history+'Input: '+`${message.content}`+'\nResponse:';

        // Send request to NLP Cloud.
        const response = await nlpCloudClient.generation(finalContent,0,200,true,'###',true,true)

        // Remove end_sequence from response.
        let cleanedResponse = response.data['generated_text'].replace('###','').trim();

        // Send response to Discord bot.
        message.reply(cleanedResponse);

        // Add the request and response to the chat history.
        history = finalContent+cleanedResponse;

        // If the chat history is bigger than 1500 tokens, we remove the oldest elements from
        // the history. We consider that 1 token = 4 characters.
        // The theoretical GPT context limit is 2048 tokens but we choose 1500 tokens instead
        // in order to be safe since the tokens count is not perfectly accurate.
        if (history.length > 1500 * 4) {
            history = history.slice(charsCount-(1500 * 4));
        }

    })();
 });


discordClient.login(discordBotToken);
You noticed that we need to manually initialize a chat discussion with some chitchat. The idea here is to show the text generation model that we want to be in a conversational mode. This chitchat is insignificant and should be as neutral as possible in order not to have any impact on the rest of the conversation.
Also note that we force the model to add "###" at the end of each generated response. This way, we can easily stop the text generation when these characters are met.
Once again, this example is for advanced usage only!
Building an advanced chatbot has never been so easy thanks to Discord and GPT models.
The main challenge is that these modern AI models are harder and harder to use due to their huge size, which is why it can be much simpler and much more cost effective to use an API like NLP Cloud instead.
If you would like to implement your own chatbot but you are not sure how to handle it, please don't hesitate to contact us!
François
Full Stack engineer at NLP Cloud